Icewind Dale: Retrospective - Part VI:
Dragon's Eye - Part I
It is important to remember that Orrick's vendor inventory changes at the commencement of Chapter Two. The details are covered in Part III but Slow, Spirit Armor and Dispel Magic are spells we don't want to miss. Especially Slow. See, Haste is great right? Doubles our party's ApR. But Haste inflicts fatigue when it wears off and Slow potentially affects more than six units. And it not only halves enemy ApR and movement rate but also inflicts a four-point penalty to their THAC0, AC and saves vs. Spell. Ideally, we cast Haste on ourselves and Slow on the enemy in order to gain a huge advantage, but I generally save Haste for the tougher combat encounters.
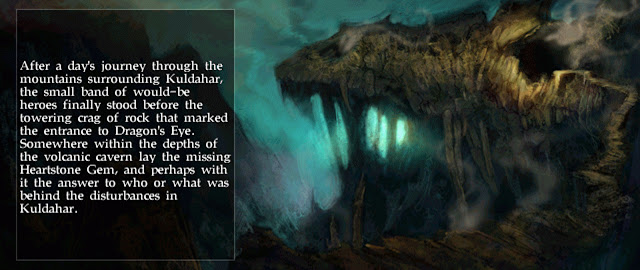
Dragon's Eye is a dormant volcano located to the southeast of Kuldahar.
It is so-named because entrance is granted through the eye of a stone dragonhead carved out of the mountainside.
The party have journeyed to Dragon's Eye in order to track down the Talonites who sacked the temple and stole the Heartstone Gem. The recovery of the gem is key to the campaign. Without it, the source of the Evil plaguing Kuldahar cannot be divined.
The Dragon's Eye megadungeon consists of five distinct combat zones. Similar to Durlag's Tower, it is not easy to backtrack out of the volcano once we have delved deep. Thus, we tend to push on and tough it out all the way to its yuan-ti-infested bowels. This is one of my fave dungeons on the Infinity Engine. (Readers can compare the IWD version of the megadungeon with the IWD2 version.)
In its upper reaches, we begin battling packs of lizard men, trolls and spiders...
... and then face off against hordes of undead and yuan-ti in its lower reaches. Dragon's Eye culminates in a pitched battle against the Marilith demon, Yxunomei. This constitutes one of the best boss battles on the Infinity Engine (covered in Part VII).
What follows is commentary on each dungeon, focused on dialogue, itemization and combat encounter design.
The upper reaches of Dragon's Eye are populated by lizard men, spiders and bombardier beetles. The lizard men - who constitute 75% of all monsters on this level - come in three varieties: greenskins, toughies and shaman. Mostly, they feel like mooks - especially the greenskins which are barely worth swinging a sword at. They make funny noises, though, so they're fun to slay.
Heading up the reptilian forces is Lispen the Lizard Man King. He speaks common with a hissy lisp:
I chose to screencap this dialogue path because there is mention of Yxunomei, the Marilith boss of Dragon's Eye. Lispen guards the upper reaches for Yxunomei because she allocates the lizard men food. Problem is, the food here referred to is actually the kidnapped people of Kuldahar. So yeah, this scaly abomination needs to die. Afterwards, the kidnapped people, who are found just to the south, are free to make their escape (30,000 XP).
The Serpent Statue flanking Lispen is holding a key arcane spell scroll, too: Fireball. This spell, which inflicts 1-6 fire damage per caster level (save for ½), is eminently useful against the trolls coming up in the next dungeon.
There is one other point of interest in this dungeon. Remember Erevain Blacksheaf? We met him in the Snowdrift Tavern in Easthaven before we set off on Hrothgar's expedition:
Well, his corpse is found in a spider lair to the south. Seems the elven hero got done in by spiders. Poor guy. But really, you'd have to be an idiot to come in here by yourself.
As we descend deeper, it becomes clear that we're talking about a pretty organized enemy here; essentially, an army.
Erevain's corpse holds a semi-useful sword, troll-bane ammo, and his journal:
(Xan was the pessimistic companion in Baldur's Gate.)
Just one last thing. There are x15 antidotes held in a chest in the north. They are potentially crucial in Part VII.
The troll tunnels make the upper reaches seem like a cakewalk. While not the most prolific or the most dangerous of Dragon's Eye denizens, trolls are found in three of the five dungeons, and they are hard-hitting tanks that regenerate their hitpoints. As per Realmslore, and with the exception of the ice variant (encountered on the approach), trolls must be finished off by either fire or acid damage. Our ability to inflict such specific damage is granted to us by limited in-dungeon itemization (flaming oils and fire/acid arrows) as well as by the arcane and divine repertoire of our spellcasters (e.g, Melf's Acid Arrow, Fireball and Flame Blade). Moreover, in an oversight by Black Isle, trolls which have been immobilized or confused by on-hit effects/spells, may be utterly vanquished by raw damage if they were immobilized or confused at the point of their being knocked to the ground. This unforced exploit makes troll-slaying much easier and less tedious.
Basically, we can lure them together and employ our collective ApR in order to beat them down. Once down, it's best to finish them off with a fiery AoE such as Fireball.
As in Lispen's domain, there are citizens of Kuldahar to save in the troll tunnels. One of these is Conlan's son, Sheemish. We merely have to clean out the approach to his prison in order to save him and the other Kuldahar kids (24,000 XP). Back in Kuldahar, Sheemish hands us Conlan's Key which opens the chest holding Conlan's Hammer (infinite enchantment for to-hit purposes).
Our thief could have also picked the lock to the chest in order to acquire this hammer for the Vale of Shadows (95% Open Lock required).
Another particularly nasty critter is the bombardier beetle. These tough buggers are found in Lispen's domain in small numbers, but here is found a veritable swarm. The beetles spit acid splash, eject a deafness-inflicting acidic vapor, and are capable of inflicting on-hit Stun (which Free Action status erroneously wards). It's worth noting that beetle acid splash can finish off knocked-down trolls, too.
The reward for fighting through this optional swarm is worth it. On a corpse we find the Battle Axe +2: Defender (AC +2) and the Long Sword of Confusion +2 (25% on-hit Confusion). These are excellent wields. To no avail, this nameless hero came packing.
Finally, after a fierce battle against four Talonite priests and several of their troll minions, we can rescue the self-sacrificing Ilmaterian priestess, Mother Egenia (36,000 XP).
In Kuldahar, we learned from Sister Calliana that Egenia was missing. Calliana was acting as head priestess in Egenia's absence. Egenia now tells us what happened:
Trolls were there. But in freeing Egenia we have freed her people, too. There is naught to do now but descend to the next level of Dragon's Eye.
(We meet up with Egenia again in the sequel, but only in spirit-form.)
The undead legions encountered in this dungeon are commanded by the powerful necromancer, Presio. Through her undead lieutenants Presio communicates with the party several times as they progress through her domain.
We learn through these dialogues that Presio is an ally of Yxunomei, and that there is an ancient grudge between Yxunomei and Belhifet (the Old Enemy).
The experience point yield for cold wights is disproportionate to their difficulty. They are pretty squishy for an enemy that yields 1,400 XP per. Cold wights - of which there are no fewer than 50 - can also be farmed ad infinitum by provoking them as respawns through repeated resting (1,500 XP). However, in this dungeon, warriors naturally reach 7th level for the ApR +½ breakpoint, so there is no reason to engage in such cheese.
In addition, a total of one dozen Blast Skeletons are dotted about the zone. Upon being hit they detonate Snilloc's Snowball Swarm. Deadly.
Presio herself is holed up in a chamber to the southeast. Now, though, actions speak louder than words. Presio is flanked by a few imbued wights and one dozen poison zombies. Clearly, she's been busy animating dead. It must have taken a couple of years to amass such a force - one which we cut through in minutes. How disheartening it must have been for her. Still, she is a formidable foe.
Presio opens proceedings by casting Mirror Image and Protection From Normal Missiles followed up by the fifth level evocation, Cloudkill. The party don't gain access to Cloudkill until the Severed Hand in Chapter Three. Aside from inflicting damage-over-time poison (for 1 entire turn), Cloudkill is capable of insta-killing any party member (sixth level or below) caught within its AoE. Very, very nasty. After that, Presio doubles her undead's attack rate with Haste and then unleashes Flame Strike and maximum Magic Missile (5 missiles). She will finally Animate Dead, cast Cloak of Fear, and wade into melee to inflict on-hit 1-round Stun.
Presio's corpse yields two items of particular note: Presio's Dagger +2 (on-hit 9 points of poison, save vs. Death for none) and the Hammer Flail +2 (15% on-hit Stun).
Found in her heavily trapped laboratory (one trap triggers Death Fog) are four arcane spell scrolls of note: Confusion, Vampiric Touch and a second instance of Skull Trap and Haste. Nice. As well, Presio's War Journal gives us a breakdown on her enemies. Listed is who she suspects to be Belhifet's minions and lieutenants along with potential meddlers from Easthaven and Kuldahar. She does not know that Brother Poquelin is actually Belhifet.
The approach to the fourth level is laced densely with traps. Clearly, intruders are not welcome here. Well, we're pushing on anyway.
The party is currently 7th level. Breakdown of current AC sources for supertanker:
Base AC: 10 (AC 10)
18 Dex: +4 (AC 6)
Plate Mail: +8 (AC -1)
Reinforced Large Shield +1: +2 (AC -3)
Helm of the Trusted Defender: +3 (AC -6)
Ring of Protection +2: +2 (AC -8)
Black Wolf Talisman: +1 (AC -9)
Girdle of Beatification: +1 (AC -10)
Battleaxe +2: Defender: +2 (AC -12) (AC -15 vs. slashing)
Have fun missing 95% of the time, assholes. Supertanker AC improves a bit more than that as the campaign progresses, too. For example, Mithral Field Plate Armor +2 will add three points and Red Knight's Shield or Great Shield +3 will add four for AC -19 (-22 vs. slashing).
Arcane spellcaster (Fighter 2→Mage 7) has broken into 4th circle for access to Spirit Armor, Emotion: Fear, Confusion and Monster Summoning II. Ranger/Cleric is still stuck on 3rd circle but has access to Dispel Magic, Animate Dead, Glyph of Warding and Protection From Fire.
Thief has decent investment in Open Lock and Find/Remove Traps (important in the yuan-ti stronghold, covered in the next post).
Experience points: 225,435 kXP + 90,000 qXP = 315,435 total XP (455,955)
Killcount: 253 (686)
Next up: The Yuan-ti horde.[Table of Contents] [Browse in Magazine view]


0 Comments